Managing Nodes
A Node is a machine that runs your AI models and answers the requests the Gateway sends it. You can connect one Node or many, and the Gateway will share the work between them.
The Nodes page is the Gateway's home page. It shows every Node registered with the Gateway, their status, and statistics for the Gateway as a whole.
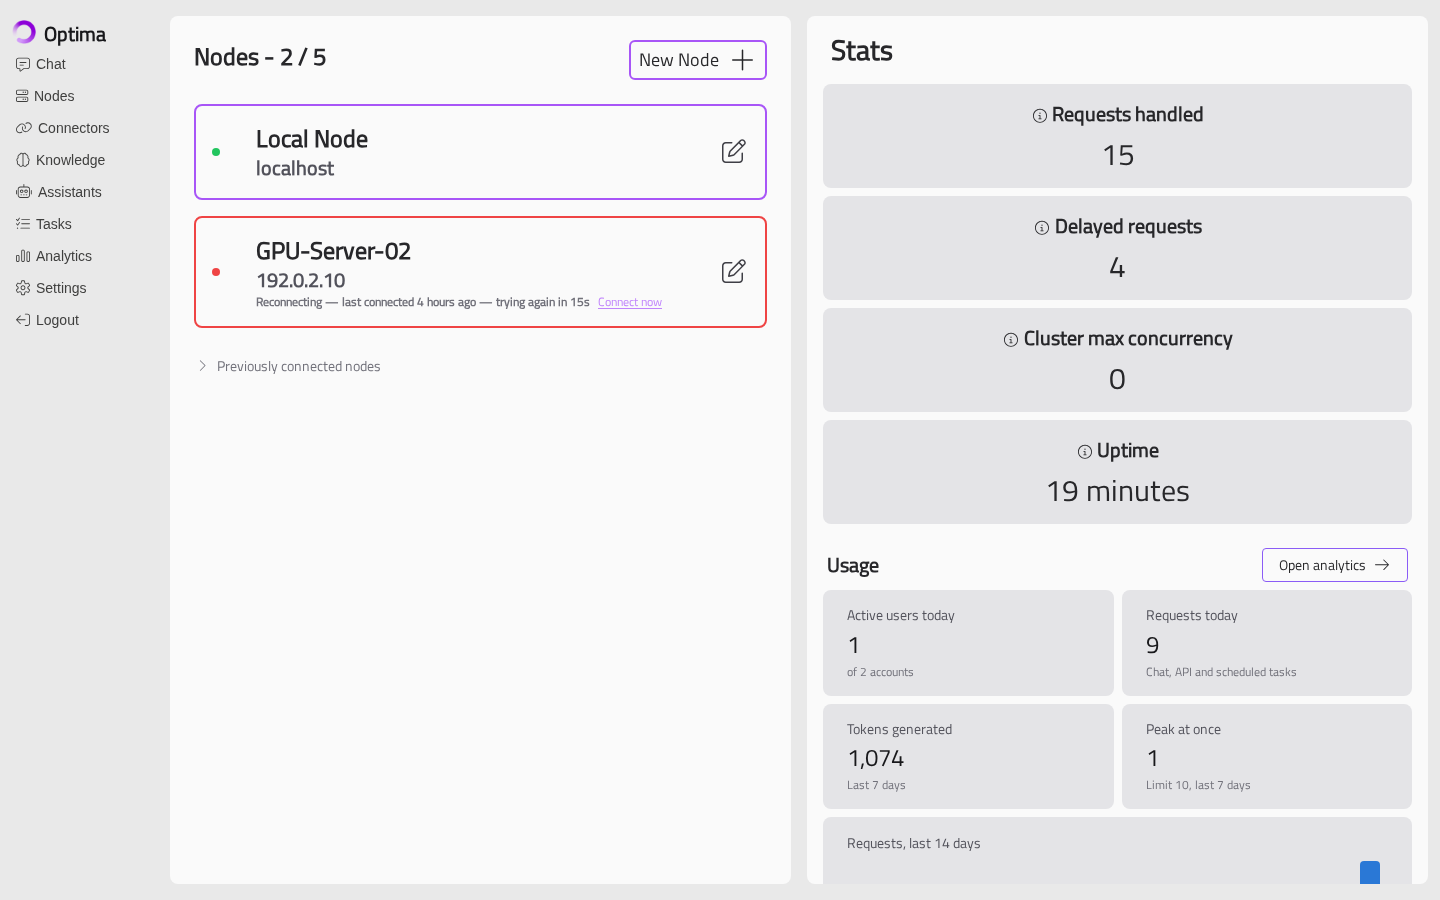
The heading shows how many Nodes you have. If your licence limits the number of Nodes, it shows that too — for example Nodes - 2 / 3. See Licensing.
Node Status
Each Node has a coloured dot:
| Colour | Meaning |
|---|---|
| Green | Connected and healthy |
| Amber | Connecting, slow to respond, a model is not running, or requests are queued |
| Red | Down, or no models enabled, or failing |
| Grey | Deactivated — not trying to connect |
Connection Status
When a Node is not connected, its card says what is happening, how long ago it was last connected, and when the Gateway will try again. For example:
Reconnecting — last connected 4 minutes ago — trying again in 27s
Point at the line to see the last error. Click Connect now to try straight away instead of waiting.
Gateway Stats
The Stats panel shows live figures since the Gateway last started:
- Requests handled — inference requests processed
- Delayed requests — requests that took longer than expected to complete
- Cluster max concurrency — how evenly several Nodes are sharing the load (shown when more than one Node is connected)
- Uptime — how long the Gateway has been running
People with the Analytics permission will also see a Usage panel. See Analytics.
Adding A Node
A Node on another machine must already have this Gateway's access key, and a firewall that lets the Gateway reach it. The installer takes care of both when you install the Node. See Installing A Node On Another Machine.
Click New Node. You will need the Nodes permission.
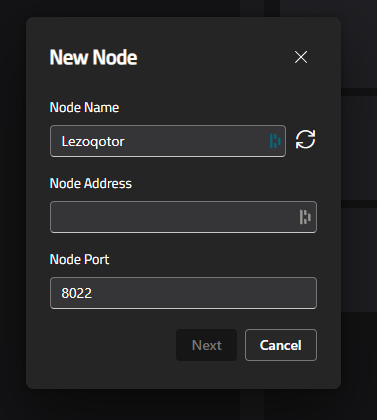
- Node Name — enter a display name for the Node. A random name is suggested; click the refresh icon for another.
- Node Address — enter the IP address or host name of the machine running the Node service.
- Node Port — the port the Node listens on. Leave it at
8022unless the Node has been set up to use a different port. - Click Next. The Gateway will connect to the Node to verify it.
- When it shows Node Verified, click Next, then Finish.
If it shows Node Verification Failed, check that:
- the Node service is running on the target machine
- the address and port are correct
- no firewall blocks the Gateway from reaching the Node on that port
- the Node's access key matches the Gateway's
The installer's Manage page, on the Node machine, shows all three: whether the service is running, its firewall status, and its access key. See Managing OnVeris.
Click Back to correct the details without retyping them.
If your licence's Node limit has been reached, the New Node button does nothing. Remove a Node, or raise the limit.
The Local Node
When no Nodes are registered, the Gateway looks for a Node on the same machine (localhost:8022). If it finds one, it will add it as Local Node, with nothing for you to do.
Auto-Discovered Nodes
With Settings → General → Auto-discover nearby nodes turned on, the Gateway will find Nodes on your local network and connect to those that share its access key. They are marked with a broadcast icon, Auto-discovered node. They are found again each time the Gateway starts, rather than saved.
Previously Connected Nodes
Below the list, Previously connected nodes remembers Nodes the Gateway has connected to before, with when it last saw them. Click Connect manually to add one back — the New Node window will open already filled in.
Viewing A Node
Click the edit icon on a Node to open its detail view.
Information
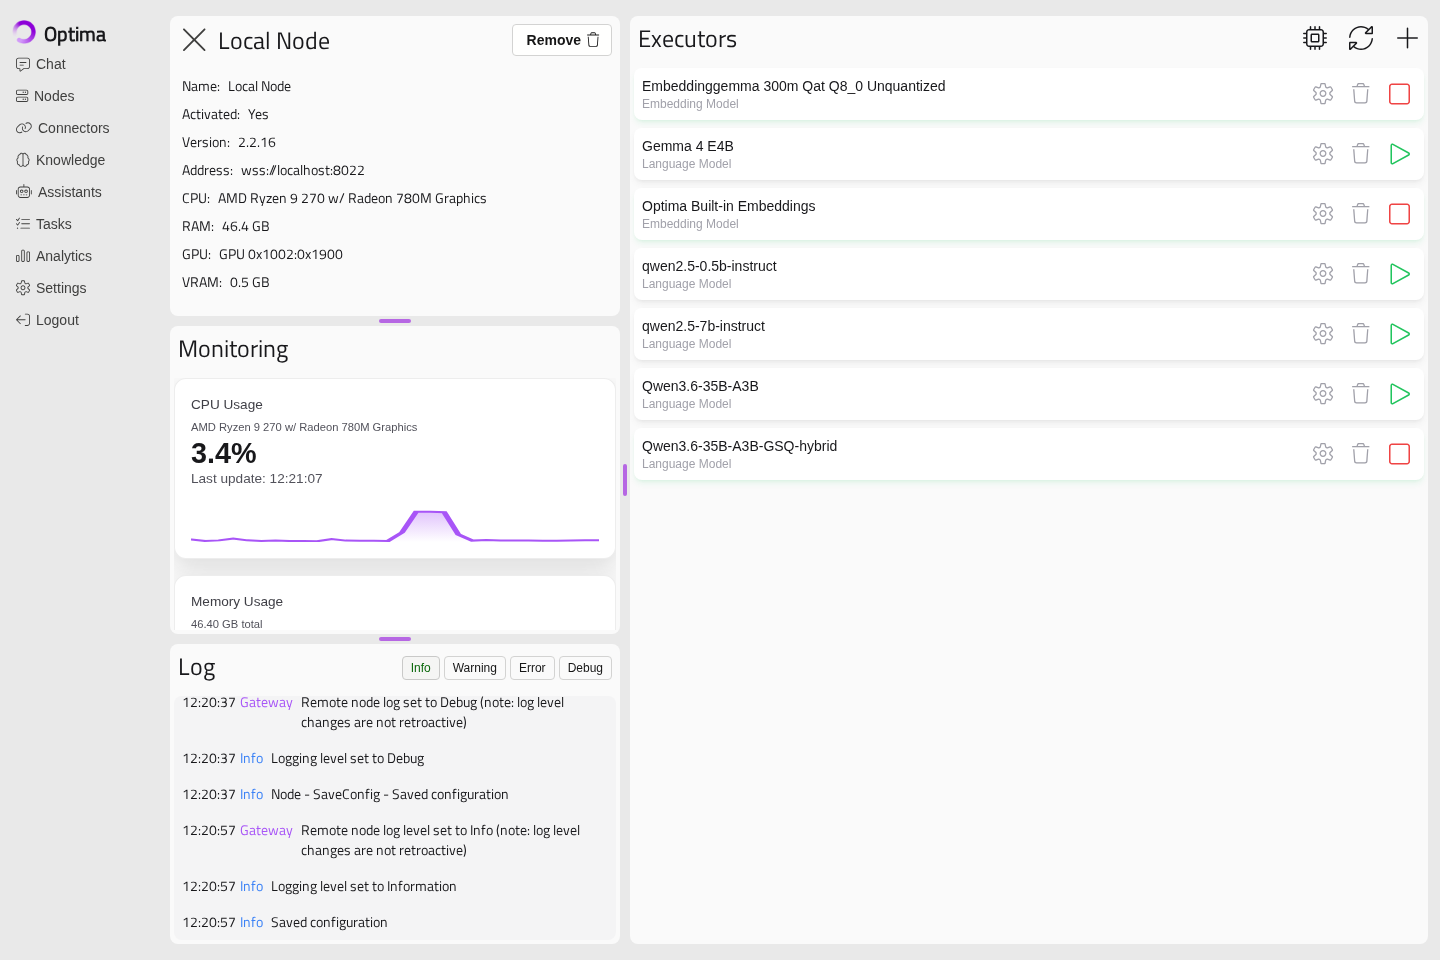
The top-left panel shows the Node's Name, Address and Version, whether it is Activated, and its hardware: CPU, RAM, GPU and VRAM.
If the Node is not connected, a banner above will explain why, and offer Connect now.
Certificate Not Trusted
The first time the Gateway connects to a Node, it records the Node's certificate, and from then on accepts only that one. This stops anything else on the network pretending to be your Node.
If a Node presents a different certificate — usually because the Node software was reinstalled — the detail view will show Certificate not trusted, and the Gateway will not connect. If you know why the certificate changed, click Trust new certificate to accept the one the Node presents now.
Monitoring
Live graphs of the Node's CPU Usage and Memory Usage, and of each GPU's use and VRAM.
Log
The Node's live log. See Diagnostics.
Executors
The models on this Node — downloading, starting, stopping and configuring them. See Managing Models.
One Node, Several Gateways
A Node can be connected to more than one Gateway at the same time — for example, a test Gateway and a production Gateway sharing one GPU server. Each Gateway adds it in the usual way. Changes one Gateway makes to the Node's models will be seen by the others.
Removing A Node
Open the Node's detail view and click Remove, then confirm. This removes the Node from the Gateway. It does not uninstall the Node software or delete any models.