Certificates And Security
OnVeris uses HTTPS to encrypt traffic between users, applications and the Gateway. A certificate that people's devices trust lets browsers and the OnVeris Chat apps connect without warnings. This page describes how to choose that certificate, which port the Gateway listens on, and how connections to Nodes and the API are secured.
Certificates are managed in the Settings window, in the Security section. You will need the Certificates permission.
Certificate Status
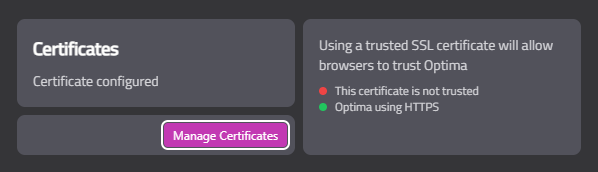
The Certificates card in Settings → Security shows whether a certificate is configured, and beside it:
- This certificate is trusted / not trusted — whether the operating system trusts the certificate. A self-signed certificate will show as not trusted unless it has been installed in the trust store.
- OnVeris using HTTPS / HTTP only — whether the Gateway is serving encrypted traffic.
Managing Certificates
Click Manage Certificates to open the Certificates window.
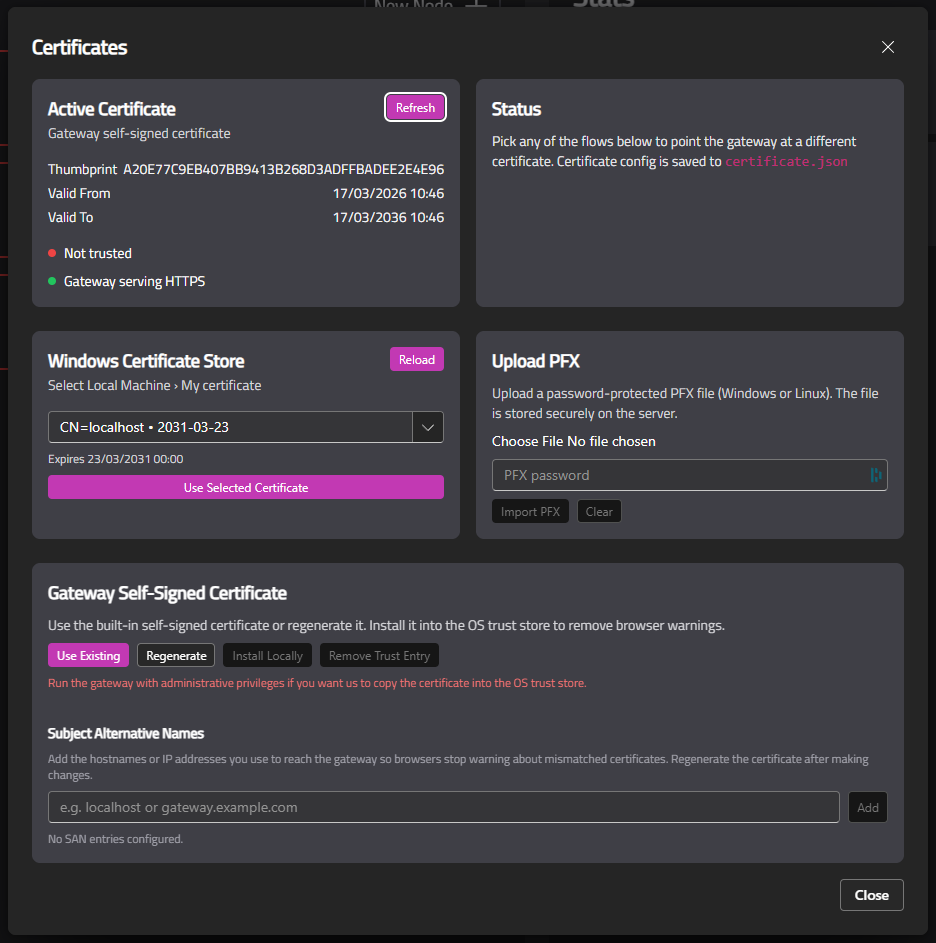
Active Certificate — the certificate in use: its Thumbprint, Valid From and Valid To dates, whether it is trusted, and whether the Gateway is serving HTTPS. Click Refresh to update it.
You can change the certificate in three ways.
From The Windows Certificate Store
On Windows, choose a certificate from the local machine's certificate store and click Use Selected Certificate. Click Reload to refresh the list.
By Uploading A PFX File
You can upload a password-protected .pfx or .p12 file — a certificate bundled with its private key, as exported from Windows or provided by a certificate authority. Enter the PFX password and click Import PFX. This works on every platform.
With The Gateway's Self-Signed Certificate
The Gateway creates its own self-signed certificate. Connections are still encrypted, but devices do not trust it until it is installed in their trust store. Until then, browsers will show a warning and the OnVeris Chat apps will ask people to trust it. See Signing In.
| Button | What it does |
|---|---|
| Use Existing | Switch back to the Gateway's self-signed certificate |
| Regenerate | Create a new self-signed certificate |
| Install Locally | Add the certificate to this machine's trust store. The Gateway must be running with administrative privileges |
| Remove Trust Entry | Remove it from this machine's trust store |
Subject Alternative Names — the host names and IP addresses people use to reach the Gateway, such as onveris.yourcompany.com. Add each one and click Add, then click Regenerate, so that browsers stop warning that the certificate does not match the address.
Tip
For most organisations, a certificate from your own internal certificate authority is the best choice: every device on your network already trusts it.
Gateway Port
The Gateway listens on port 443 — the standard HTTPS port — unless you change it. To change it, enter the new port in Settings → General → Gateway port, click Save Port, then restart the Gateway service. You can restart it with Restart in the installer's Manage page. See Managing OnVeris.
If the port is in use when the Gateway starts, the Gateway will use port 8025 instead.
The firewall rule the installer adds on Windows and macOS is for the Gateway program, so it covers a new port without any change. On Linux the rule is for the port: after changing it, open Manage and click Allow on the Gateway's card. See Firewall.
Note
With any port other than 443, people must include it in the address — for example https://onveris.yourcompany.com:8443, or Port in the OnVeris Chat apps' Advanced sign-in options.
Node Connections
Connections between the Gateway and its Nodes are encrypted too. The first time the Gateway connects to a Node, it records that Node's certificate, and from then on it only accepts that certificate. See Managing Nodes.
API Access
Every API request must carry an API Key or come from a signed-in user. See API Keys.